Note: The editing features explained below are only available when the resource has been opened from the Resources section within the Admin Area.
Once you have created your resource, you can add attachments for your users to download. These could be templates, forms or your own PDF version of the resource to enable it to be read offline.
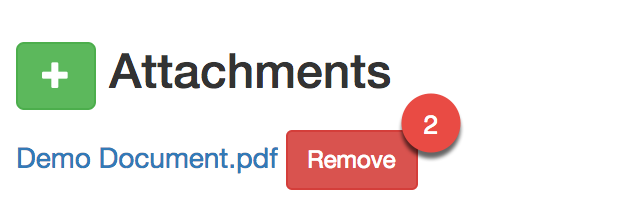
Go to Admin Area / Resources, search for and open the resource you want to attach a file to. Scroll to the bottom of the page where you will find a heading for Attachments (see screenshot below).

Adding a file:
1. Click the green [+] button (#1 in screenshot above).
2. Locate and select the file you wish to attach (you will need to repeat this process to attach multiple files) from the file browser.
3. Your file will be uploaded and appear listed under the attachments heading with its' filename, see the screenshot below.

Please note that if your resource has been published, the files you attach are immediately available for download so only add your attachments if you are happy for your users to access the file.
Removing a file:
To remove an attached file, click the Remove button (#2 in screenshot above) and confirm you wish to proceed in the alert box that appears.
The file will then be deleted and removed from the list of attachments.
Please note that this action is not reversible so ensure that you save a copy of the file before removing it.
Renaming a file:
If you are not happy with the name of the attachment, you will need to remove it, rename the file on your computer/ device and then reattach it.
