

When adding the content for your resource or mailing, the editor toolbar will be visible. This toolbar works similarly to other word processing software that you may have used and looks like this:

Let's break the Toolbar down by section:

1. Source - This opens the source code, allowing you to amend the HTML code directly.
2. Clear Formatting button - by highlighting text and clicking on this button, you will clear all the text formatting eg alert boxes, bold, underscore. Note: Heading sizes will not be removed. You will have to change them via Styles (#3 below).
3. Styles - Various styles are available to draw attention to your text, as follows:
| Alert banners - will put a rounded coloured box around your text, as shown on the right. Available colours: Grey, green, blue, orange and red. |  |
|
Highlight Text - Highlights selected text, as show to the right. Available colours: Grey, green, blue, orange and red. |
|
| Small Text will reduce the size of text by half | |
| Sample Output Text - text will be more widely spaced. |  |
| Lead Body Copy - This text is thinner and larger. |  |
|
Text Colour - There are a number of choices of colour for your text. This can be combined with any of the options above to create the style you need (e.g. Lead body copy in Blue). Available colours: Grey, green, blue, orange and red. |
 |
Once you have chosen your styles, you can format the text further by using the other options, such as 'normal' (#4) and 'Size' (#5).
4. Format - This option will format the paragraph in the style you choose from the dropdown list.
5. Size - This option will format the size of your font.

6. Label
Add/ Edit a label. Choose a colour and the text to appear in the label:
![]()
7. Images
Add an image, either from the image gallery or upload your own. For existing images, you can then define settings such as size, alignment etc.
Once added into your content, you can move images up or down by dragging them. To move it to the left or right, you will need to edit the alignment property from the Image Properties window (see instructions below). To delete the image, single click on it to select it and press the backspace or delete key on your keyboard.
To upload an image from your device, click where you would like your image positioned and click on the image button (#9 in the Toolbar screenshot above).
You can choose an image from the Image Gallery (images that have been used previously) by clicking on 'Browse Server' (located in the Image info tab) or by uploading your own from file using the 'Upload' tab (see below).
To choose an image from file, click on the Upload tab (#1 in the screenshot below).
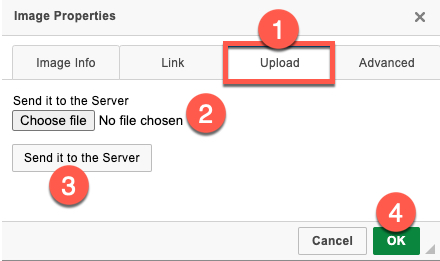
Click on the 'Choose file' button (#2) and select the image from your device. The name of your file will appear next to the 'Choose file' button. Click on 'Send it to the Server' (#3), followed by OK (#4).
You will automatically be taken to the 'Image info' Tab (#1 in the screenshot below):

Once you have selected an image, the preview box (#2) will show you how your image will look.
Size:
The image width (#3) and height (#4) in pixels will be those of the original image and may need to be changed. Once you change the width, the height will change automatically provided the padlock (to the left of #5 in the screenshot above) is locked.
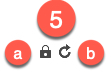
The padlock (#5a) locks the aspect ratio (width/height ratio) and helps to avoid images being distorted when resized. Locked means the aspect ratio is fixed (changing the width will automatically change the height and vice versa), unlocked means you can change the dimensions however you like. The Return icon (#5b) returns the image to its original size.
Border:
If you wish to place a border around your image, add the thickness of the line in the border box (#6). The higher the number, the thicker the border.
Spacing/ Padding:
HSpace (#7) is the horizontal spacing in pixels around your image and VSpace is the vertical spacing (#8).
You can choose the Alignment (#9) of your image to be to the left or right.
Once you are happy with the above settings, click OK and your page will be updated. If you need to update these settings, double click on your image and the Image Properties window will reopen.
8. Thumbnail
A Thumbnail unit is a box of text, with a header and paragraph text. You can have a number of Thumbnail units across a page. To add a collection of thumbnail units, click on the Thumbnail icon and simply enter the number of units you'd like to appear in a row and update the units which can look something like this:
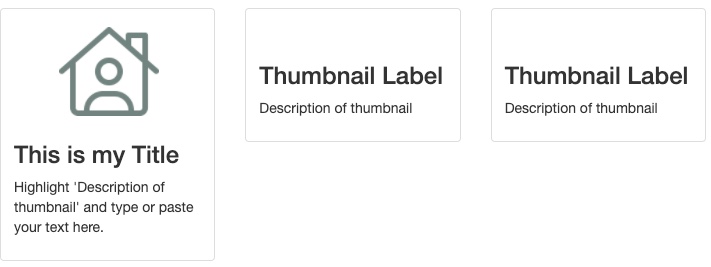
To add text to the heading or description, highlight the text that is there and type or paste your own text in place.
To add an image to the Thumbnail, click in the space above the title and add an image following the instructions in 5 above. If you position your image on the left, then indent it using the indent button (#12 in the second row of the toolbar below) it will appear centred.
9. Table
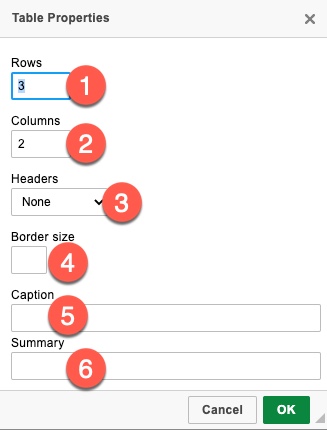
To create a table, click on the Table icon and enter the rows (#1) and columns (#2) required and any additional settings (e.g. header row (#3), Border size (#4), caption (#5) and Summary (6) etc.). You can then update the contents in the main editor.
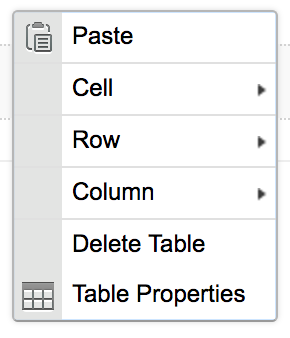
To update an existing table, right click inside the table and use the options in the menu.
10. Line/ Separator
Adds a horizontal line to separate your content.
Second Row of Toolbar

| 1. | Link - Click to add/ update a link to a webpage, to embed the text or to link to an email package. For detailed instructions, please see below this table. | |
| 2. | Remove Link - Highlight a link and click on this button to remove it. | |
| 3. | Bold your text | Bold |
| 4. | Italicise your text | Italicise |
| 5. | Underscore your text | Underscore |
| 6. | Strikethrough your text | |
| 7. | Subscript | Subscript isThe small text here |
| 8. | Superscript | Superscript isThe small text here |
| 9. | Automatic numbering |
|
| 10. | Bullet points. Use the indent key to add bulleted points |
|
| 11. | Remove Indent. This icon will only be available if you place your cursor within a paragraph that has been indented. By clicking on it, it will move the whole paragraph to the left. You can use thismultiple times if your paragraph has been indented numerous times. | 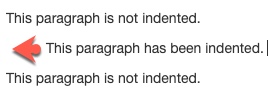 |
| 12. | Add an Indent. This will indent your line or paragraph of text to the right. It can be clicked multiple times to move your text on the page. | 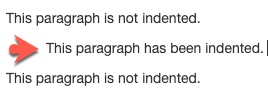 |
| 13. | Quote Properties - Add a quote to your Resource or Mailing by clicking on the Quote Properties button. Type in the quote text and the source. Set the alignment and choose a colour. It will look like the quote to the right. |  |
| 14. | Align to the left | |
| 15. | Align to the right | |
| 16. | Centre text on the page or within column etc | |
| 17. | Justify the left and right side of text to the margins. |
Links
To create a link, highlight the text (#1 below) that will form your link and click on the link button. ![]()
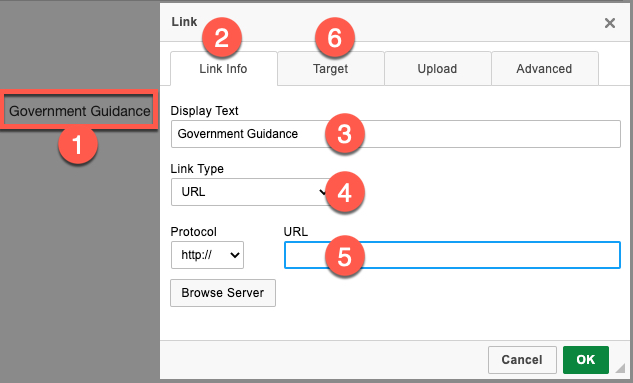
The 'Link Info' tab will open (#2 in the screenshot above) and your text will be displayed in the 'Display Text' box (#3). Select your 'Link Type' (#4) - URL, Embed text or email. To link to a website, paste the website address (e.g. https://www.google.com) into the URL box (#5). If you wish the link to be opened in a new tab, click on Target (#6)and select 'New Window' (#7 in the screenshot below). Click OK.

To link to an email address, you could set the 'Display Text' as a person's name or email address (#3 above), set the 'Link Type' to email (#4 above) and the following Link dialogue box will open:

The Display Text (#1) is your highlighted text, Link type (#3) is email. Add the email address (#3) and optionally provide a message subject (#4) and Message body (#5). Click OK. When someone clicks on that link, it will open a new email message in their default email application with the settings you have added here. They can then customise the message as required before sending.
Line Breaks
One useful tip when writing/editing your resources and mailings is the use of line breaks. There are two types of line break:
1. Shift enter/return will give you a line break with less spacing than a new paragraph (#2 below). This is useful when using bullets/numbering or some other style of formatting (alert boxes in particular) where you want to start a new line without starting a new bullet/number/alert box.
2. Enter/Return will give you a new paragraph with a larger gap between the two paragraphs.